First Connection
Connect Using SSH
Use Windows Terminal or Command Prompt to open a secure connection to your Linux server.
By the end of this guide you will have
- Found your server's IP address on the local network.
- Connected to the server securely using SSH.
- Reached the Linux command prompt for the first time.
Step 1 – Find your server on the network
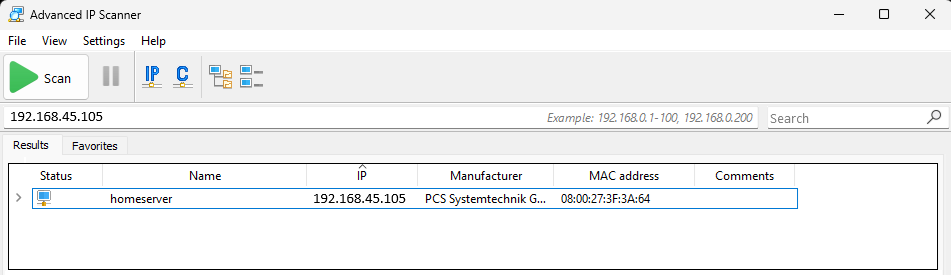
Open Advanced IP Scanner, then click the green Scan button. Wait for the scan to finish and look for the hostname you chose during setup. In this example the server is called homeserver.
Make a note of the IP address shown beside the server. The example below shows 192.168.45.105, but your address will be different.
Step 2 – Open the first SSH connection
Open Windows Terminal or Command Prompt. Enter the command below, replacing the example username and IP address with your own details:
ssh homeserver@192.168.50.219The text before the @ symbol is your Linux username. The numbers after it are the server's IP address.
The first time Windows connects to this server, SSH will say that the authenticity of the host cannot be established. This is normal: your PC has not saved this server's identity before.
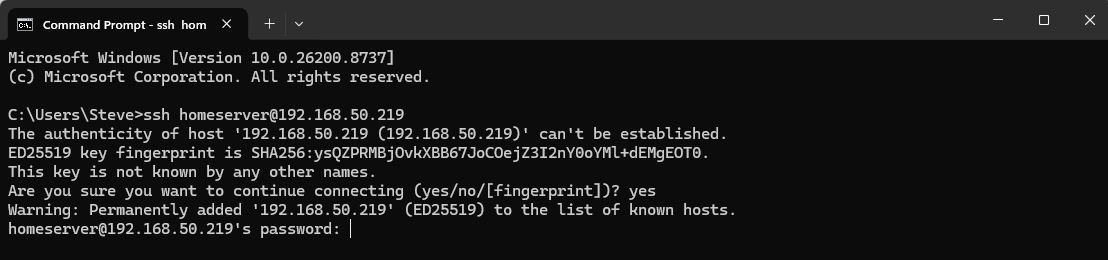
Type yes and press Enter. Windows will save the server's SSH fingerprint in its known-hosts list, so this question normally appears only once.
Step 3 – Enter your password
You will now be asked for the password belonging to your Linux username.
Step 4 – Confirm that you are logged in
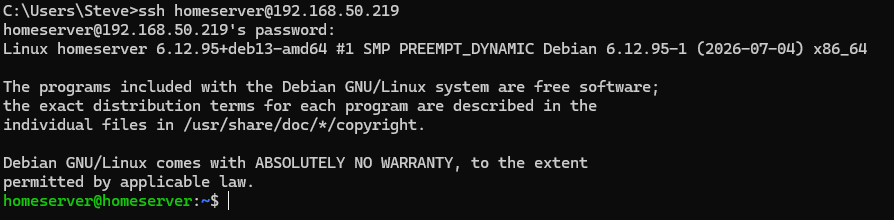
After the password is accepted, the server displays its Linux welcome information and then gives you a command prompt similar to:
homeserver@homeserver:~$The first name is the logged-in user, the second is the server hostname, and the ~ means you are currently in that user's home folder. The flashing cursor after the $ shows that the server is ready for your next command.