Getting Started
Raspberry Pi Setup
Preparing Raspberry Pi OS Lite (64-bit) for the first boot
Download Raspberry Pi Imager, choose Raspberry Pi OS Lite 64-bit, configure the first-boot settings and write the completed operating system to a microSD card.
By the end of this guide you will have
- Raspberry Pi Imager installed on Windows.
- Raspberry Pi OS Lite 64-bit selected.
- A hostname, username and password configured.
- SSH enabled before the first boot.
- A completed microSD card ready to insert into the Raspberry Pi.
1. Download Raspberry Pi Imager
Raspberry Pi Imager is the official Windows application used to prepare the storage device that the Raspberry Pi will boot from.
It downloads Raspberry Pi OS, writes it to the microSD card and saves the settings that the server will use on its first boot.
-
Open the official Raspberry Pi website.
Find Raspberry Pi Imager and choose the Windows download.
-
Open the downloaded installer.
Use the default installation choices.
- Open Raspberry Pi Imager.
2. Select Raspberry Pi 5
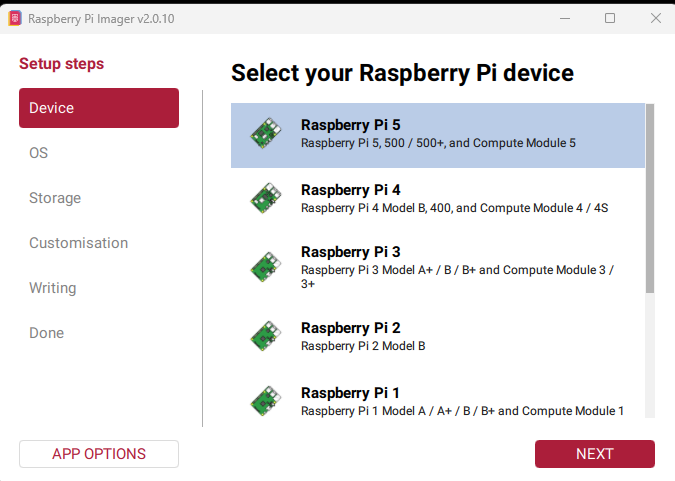
Selecting the correct Raspberry Pi model helps Imager show compatible operating systems.
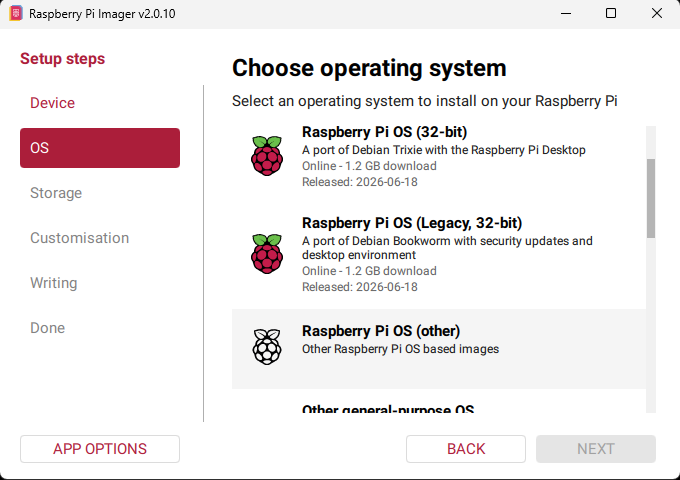
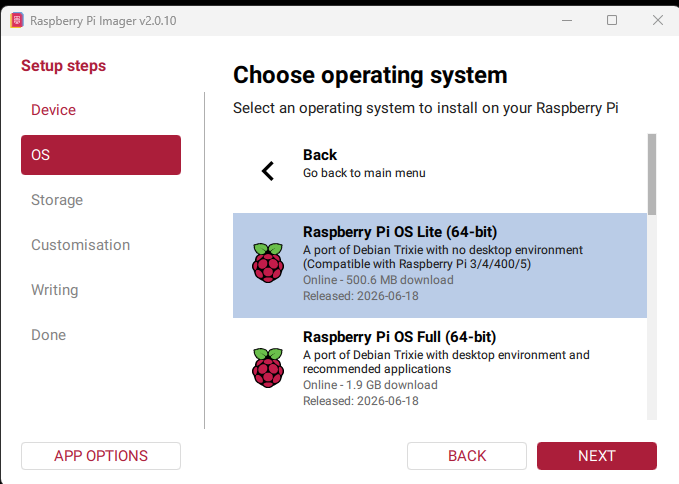
3. Choose Raspberry Pi OS Lite 64-bit
This guide uses one tested operating system: Raspberry Pi OS Lite (64-bit).
Why use the Lite version?
The server will be controlled from another computer using SSH and CasaOS. It does not need a graphical desktop, monitor, keyboard or mouse. A computer operated this way is described as headless.
Why use 64-bit?
Raspberry Pi 5 and the 8GB memory model are designed for a 64-bit operating system. It also provides the best compatibility with the Docker containers used later.
4. Select the microSD card
Insert the microSD card into the Windows computer using a built-in card reader or a USB card reader.
Choose the card in Raspberry Pi Imager and check its capacity carefully.
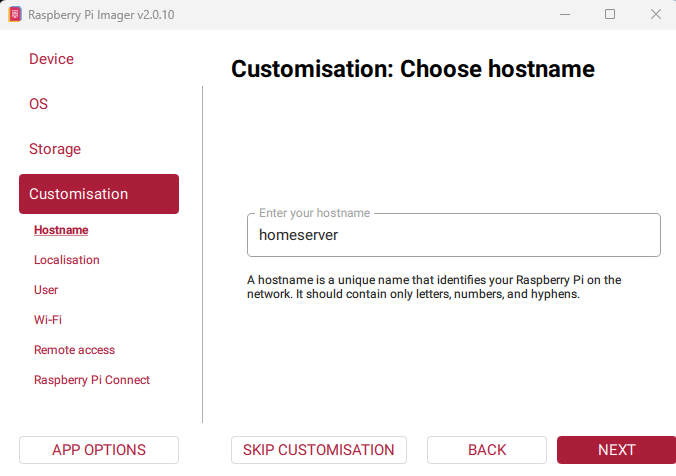
5. Choose a hostname
The hostname is the name that identifies the Raspberry Pi on the local
network. This guide uses homeserver as an example.
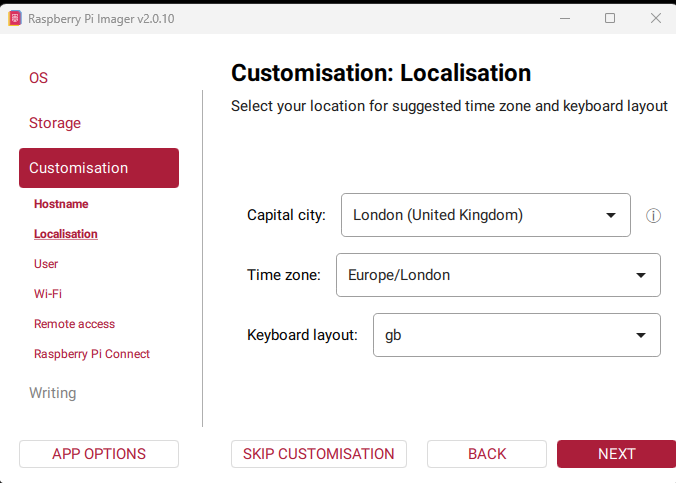
6. Set localisation
Choose the nearest capital city, correct time zone and keyboard layout. These control the system clock and keyboard behaviour.
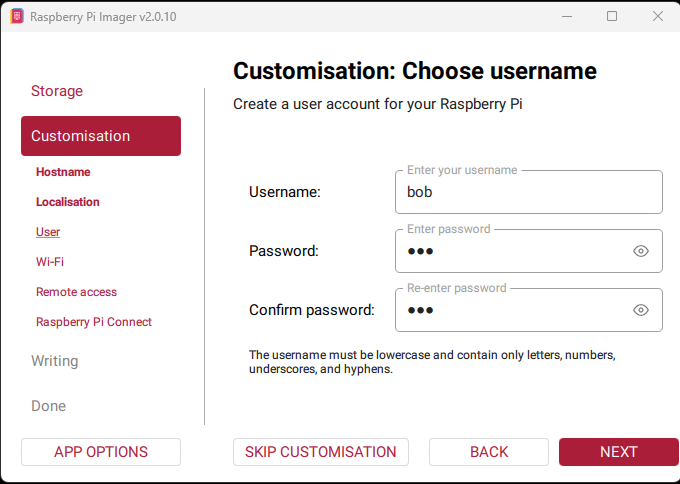
7. Create the administrator account
Enter a lowercase username and a strong password. This account will be used when connecting to the Raspberry Pi through SSH.
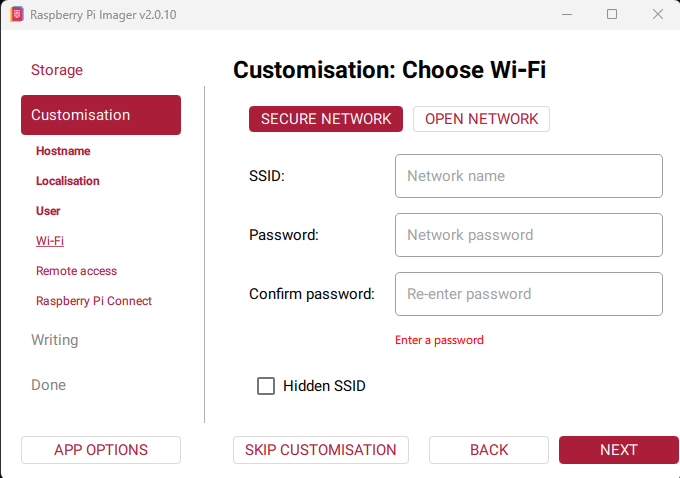
8. Configure Wi-Fi only if needed
Ethernet is recommended for a server because it is normally faster and more reliable.
If the Raspberry Pi cannot use Ethernet, enter the Wi-Fi network name and password.
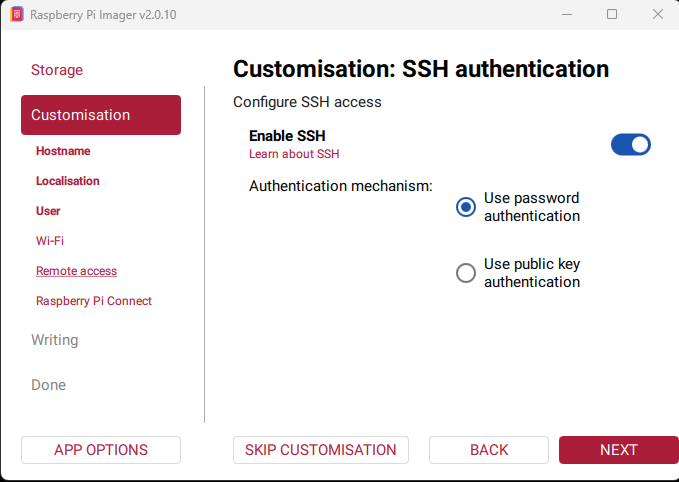
9. Enable SSH
SSH allows another computer to control the Raspberry Pi without a monitor, keyboard or mouse connected to it.
10. Leave Raspberry Pi Connect disabled
Raspberry Pi Connect is a separate remote-access service and is not used by this build.
Home Server Guide uses SSH on the local network and later documents its own remote-access setup. Continue without enabling Raspberry Pi Connect.
11. Write the microSD card
Before writing, confirm:
- Device: Raspberry Pi 5
- Operating system: Raspberry Pi OS Lite (64-bit)
- Storage: the intended microSD card
- SSH: enabled with password authentication
- Select Next.
- Approve the warning that the card will be erased.
-
Wait while Raspberry Pi Imager writes and verifies the card.
Do not remove the card or switch off the computer.
- Wait for the completion message.
- Safely remove the card from Windows.